

Table views UI
In the Syside VS Code Extension, once a table view exists you work in the table itself: open it from the SysMLv2 Views panel or from its source definition, then filter rows, edit cells inline and export what you see. To define the views themselves, see Table view structure.
SysMLv2 Views panel
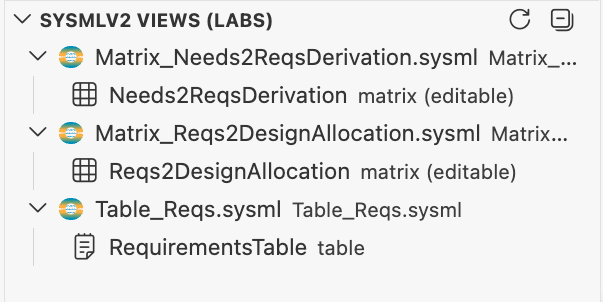
All available views in the current workspace are listed in the SysMLv2 Views panel
in VS Code’s Explorer sidebar titled SysMLv2 Views. Once a view is written in
a .sysml file, it appears here automatically.
Click the view name to open it as a panel
Click the pencil icon on the right to jump to the SysML source definition
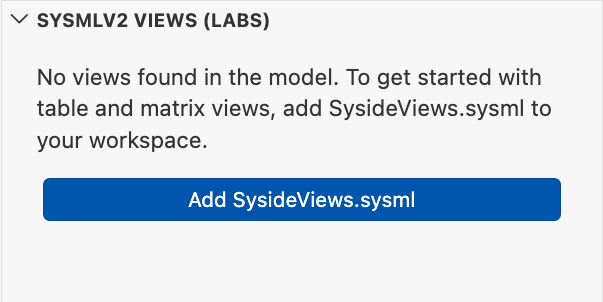
When opening a workspace for the first time, the SysMLv2 Views panel offers to add the
SysideViews.sysml library file to the workspace directory. This is required for any
grid view definitions to work. Accepting the prompt places the library automatically.
The library is also available from the Sysand registry.
Warning
There is a known bug where renaming the SysideViews.sysml file after it has been
added to a workspace can cause the extension to stop resolving the library.
Open from the editor
A view can also be opened directly from its source definition: right-click inside a
.sysml (or .kerml) editor and choose Syside: Visualize view →
As table to open the view at the cursor position as a populated table or
matrix. Choosing As diagram renders the same view as a diagram instead.
Save view changes
A table view stages every change before writing it to the source .sysml file. A
banner at the top of the view counts what is pending. Inline cell edits are model
changes, committed with Save Model Changes. Resizing, reordering or hiding
columns and filtering rows are view changes, committed with
Save View Changes. When both kinds are pending,
Save All Changes commits them together, and each kind can also be
discarded on its own. Matrices have no staged changes: their edits are written
immediately, and their display options are not saved to the view.
Working with tables
In a table view, rows are model elements and columns are their aspects: names, documentation, attribute values, constraints.
Filter rows
Type in the search bar at the top of the table to filter rows across all columns simultaneously. Column-level filters live in a separate row of filter boxes: the Column filters toolbar toggle, off by default, shows and hides them, and a Clear column filters button appears once any of them holds text.
Filters are staged as view changes. Clicking Save View Changes at the top of the view writes the filter text into the view definition, so the filtered state is restored the next time the view is opened.
Hierarchical table views add an Include parents toggle next to the search bar, off by default. While a filter is active and the toggle is off, only rows whose own content matches are shown, as a flat list. Turning the toggle on keeps the ancestor rows of every match, preserving the tree context. When no filter is active the toggle has no effect.
Sort rows
Click a column header to sort by that column, and click again to reverse the direction. For multi-column sorting, use the + Add sort button in the toolbar to build a sort stack. Each entry appears as a chip with a priority number and a direction indicator. Clicking the indicator cycles it through ascending, descending, and removed. × removes an entry, and once the stack holds more than one entry, arrows reorder their priorities.
Sorting is a display-side setting only. It is not written to the view definition.
Show and hide columns
The Shown columns dropdown in the toolbar toggles individual columns on and off. Its label shows how many columns are currently hidden. Like drag-and-drop column reordering, visibility changes are staged and committed with Save View Changes. The resulting column order is saved into the view definition, with hidden columns omitted.
Inline editing
Cells with an editable representation can be edited directly in the table or via the right-click context menu (View Row Details). Edits are staged and written to the model when you click Save Model Changes (see Save view changes).
Row details
Right-clicking any row opens a context menu with a View Row Details action that opens a modal showing all columns for that row in a scrollable vertical layout. Editable fields can be edited directly inside the modal. Changes are saved on confirm or discarded on cancel.
The Row Details modal renders documentation values as Markdown, so diagrams and screenshots can be embedded directly in requirement documentation using standard Markdown image notation:

The image reference supports the following patterns:
Pattern |
Resolution |
|---|---|
|
Relative path, resolved against the directory of the |
|
Absolute filesystem path. |
|
Absolute |
|
Relative |
Local files must be inside the opened workspace. A file that is missing or outside the
workspace renders as an inline Image not found annotation instead of a broken image.
Web URLs (https:// or http://) are not supported.
Note
View Row Details is disabled while there are unsaved cell changes in the main table. Save or discard the pending changes first.
View system hierarchy
A hierarchical table view renders model elements in a collapsible tree, reflecting parent–child usage nesting. Expand or collapse individual rows by clicking the toggle in the first (hierarchy) column.
Create requirements
Right-click a row and choose Add Requirement to create a new requirement next to it. The creation dialog collects the new element’s names and relationships, previews the exact SysML that will be written, and appends it to the model file on confirmation. The new row appears immediately if it satisfies the view’s filters.
In flat table views the new element is created next to the clicked row: the namespace comes pre-filled from the row element’s owner. The menu entry is disabled when the view’s filters do not admit requirements, and whenever the model cannot currently be written to: it has errors, source files hold unsaved edits, or another write is still in flight.
Create rows in a hierarchical table
In a hierarchical table, right-clicking a row offers two entries, both opening the creation dialog with its namespaces filled in from the clicked row:
Add Sibling Requirement places the new row alongside the clicked one.
Add Sub-Requirement places the new row underneath the clicked one.
What the dialog creates depends on the clicked row:
On a row typed by exactly one requirement definition, the dialog creates a new requirement definition next to that definition, and a usage typed by it. A sibling usage goes next to the row, and a sub-requirement inside the row’s definition.
On any other row, such as a part, an untyped requirement or the definition at the top of the tree, the dialog creates a requirement usage only. A sibling goes into the row’s owner, and a sub-requirement inside the row’s element.
Each pre-filled field carries an ⓘ hint naming the namespace it was locked to and why.
Both entries are grayed out on a row whose element appears more than once in the tree, since the new requirement would land under every occurrence (see Hierarchical tables). When a new requirement would appear in several places for another reason, such as a sub written inside a definition that is used more than once, the dialog asks for confirmation before saving.
If a namespace cannot be mirrored from the clicked row, that field falls back to the full list and a notice points out that the unlocked fields need to be picked by hand.
Work with fanned-out rows
Columns are not limited to one cell per row. A table can fan a row out into several rows, one per element a column found: for example one fanned-out row per port of each part. The cells of the other columns are merged across the fanned-out rows, so the part stays readable alongside its ports (see Fanning a row out).
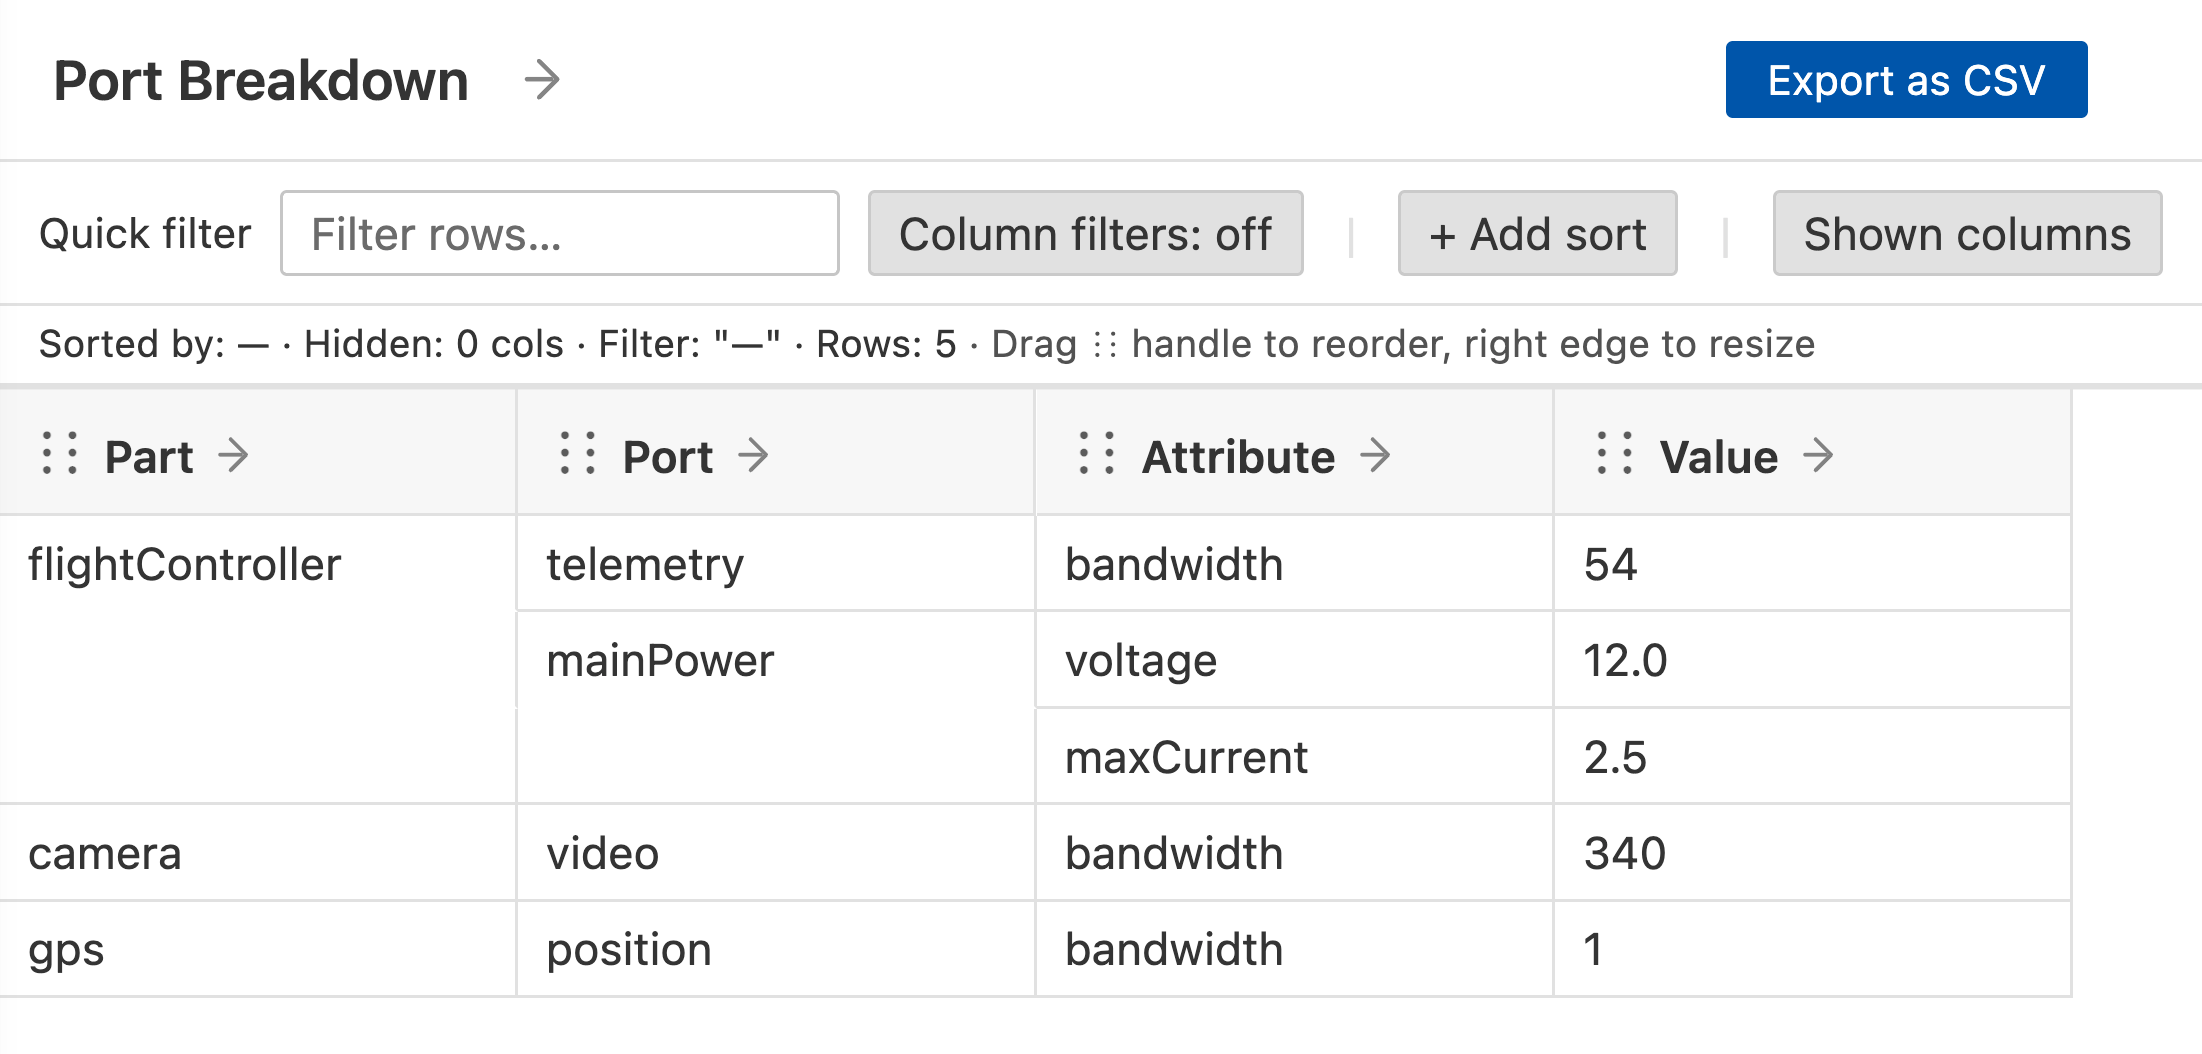
A merged cell edits the one element behind it, so changing it is a single change rather than one per fanned-out row. Fanned cells write to their own target: an edit in a port’s fanned-out row lands on that port. The usual table operations keep the fanned-out rows together:
Sorting by a fanned column reorders the fanned-out rows of each part among themselves, never across the whole table.
Filtering applies to the fanned-out rows. Those that do not match drop out, and the part drops too once none of its fanned-out rows are left. A part whose fan-out found nothing keeps its row.
CSV export writes one line per fanned-out row and repeats a merged value on each line, as unmerging the cells in a spreadsheet would.
Export to CSV
Both table and matrix views have an Export as CSV button in the top-right corner of the panel. Clicking it opens a save dialog. Once the export completes, a notification with an Open action points at the written file.
In table views the button is disabled while there are unsaved cell changes. Save or discard the pending changes first.
A hierarchical table exports its whole tree,
collapsed rows included, one line per row in the order the fully expanded tree shows
them. Since a CSV file has no indentation, the export adds a leading Level column
that carries the hierarchy instead: 0 for a root row, 1 for its children, 2 for
their children, and so on. Together with the row order this reconstructs the tree,
because a row’s parent is the nearest row above it with a level one lower. This
requirement hierarchy:
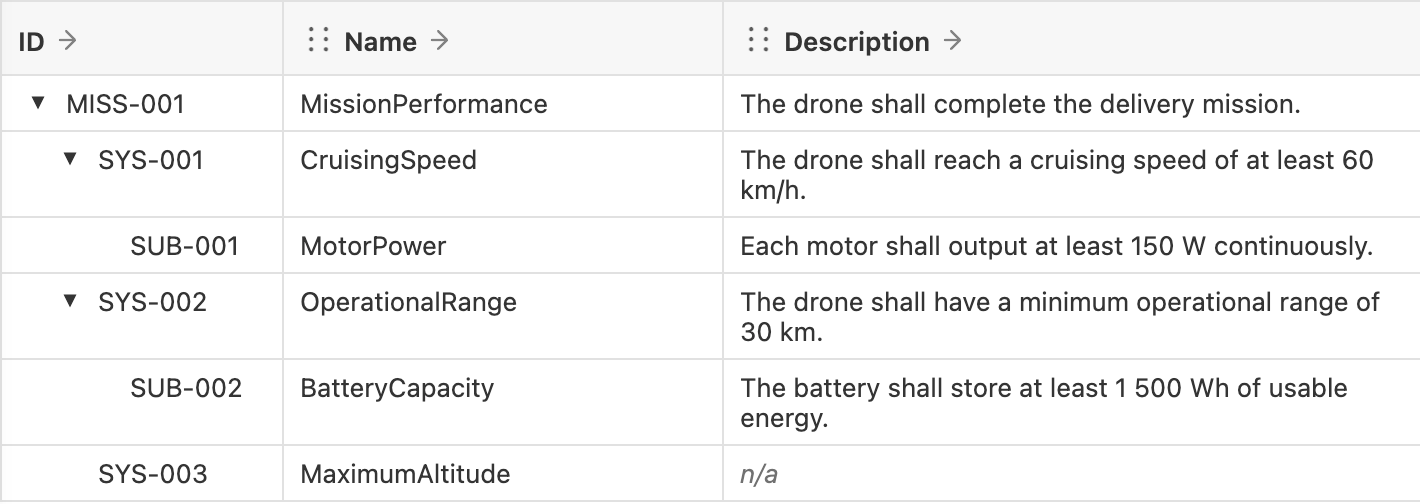
exports as:
Level,ID,Name,Description
0,MISS-001,MissionPerformance,The drone shall complete the delivery mission.
1,SYS-001,CruisingSpeed,The drone shall reach a cruising speed of at least 60 km/h.
2,SUB-001,MotorPower,Each motor shall output at least 150 W continuously.
1,SYS-002,OperationalRange,The drone shall have a minimum operational range of 30 km.
2,SUB-002,BatteryCapacity,The battery shall store at least 1 500 Wh of usable energy.
1,SYS-003,MaximumAltitude,n/a
SUB-001 at level 2 belongs to SYS-001, the level-1 row above it. SYS-002 is also
at level 1, so it is a sibling of SYS-001 under MISS-001, not a child of the
SUB-001 row directly above it. The table’s own columns follow Level in the order
the table shows them.