

Get started with table views
This example introduces table views by building one: a table over two requirements, adding one column at a time. Each step introduces one concept briefly and links the page that explains it in depth.
To get started, copy and save this model as ExampleModel.sysml. It has two requirement
definitions, each with an ID, documentation, and a subject:
package ExampleModel {
    part def Drone {
        doc /* A quadcopter delivery drone. */
    }
    part def Battery {
        doc /* A rechargeable power source. */
    }

    requirement def <'REQ-001'> MaxAltitude {
        doc /* The drone shall not exceed an altitude of 500 m. */
        subject drone : Drone;
    }
    requirement def <'REQ-002'> BatteryEndurance {
        doc /* The battery shall sustain 30 minutes of flight. */
        subject battery : Battery;
    }
}
Select the rows
The table view is itself a SysML element, written in the same workspace. It imports
SysideViews, the library the SysMLv2 Views panel offers to add the first time you
open it, so accept that prompt before writing a view. TVD, MVD and ColRep are
short names the library declares for its table view definitions, matrix view
definitions and column representations, which is why the view below is typed
TVD::TableView.
The view’s expose statement casts a wide net over the model, and filter narrows
the catch by type. Save this as MyViews.sysml:
package MyViews {
    private import SysideViews::*;

    view myRequirementsTable : TVD::TableView {
        expose ExampleModel::*;
        filter hastype SysML::RequirementDefinition;
    }
}
Everything directly under ExampleModel is exposed, and only the requirement
definitions survive the filter: MaxAltitude and BatteryEndurance become the two
rows (see Expose and filter). A set of boolean attributes
refines what the selection collects, such as whether abstract definitions are
included (see ContentView attributes).
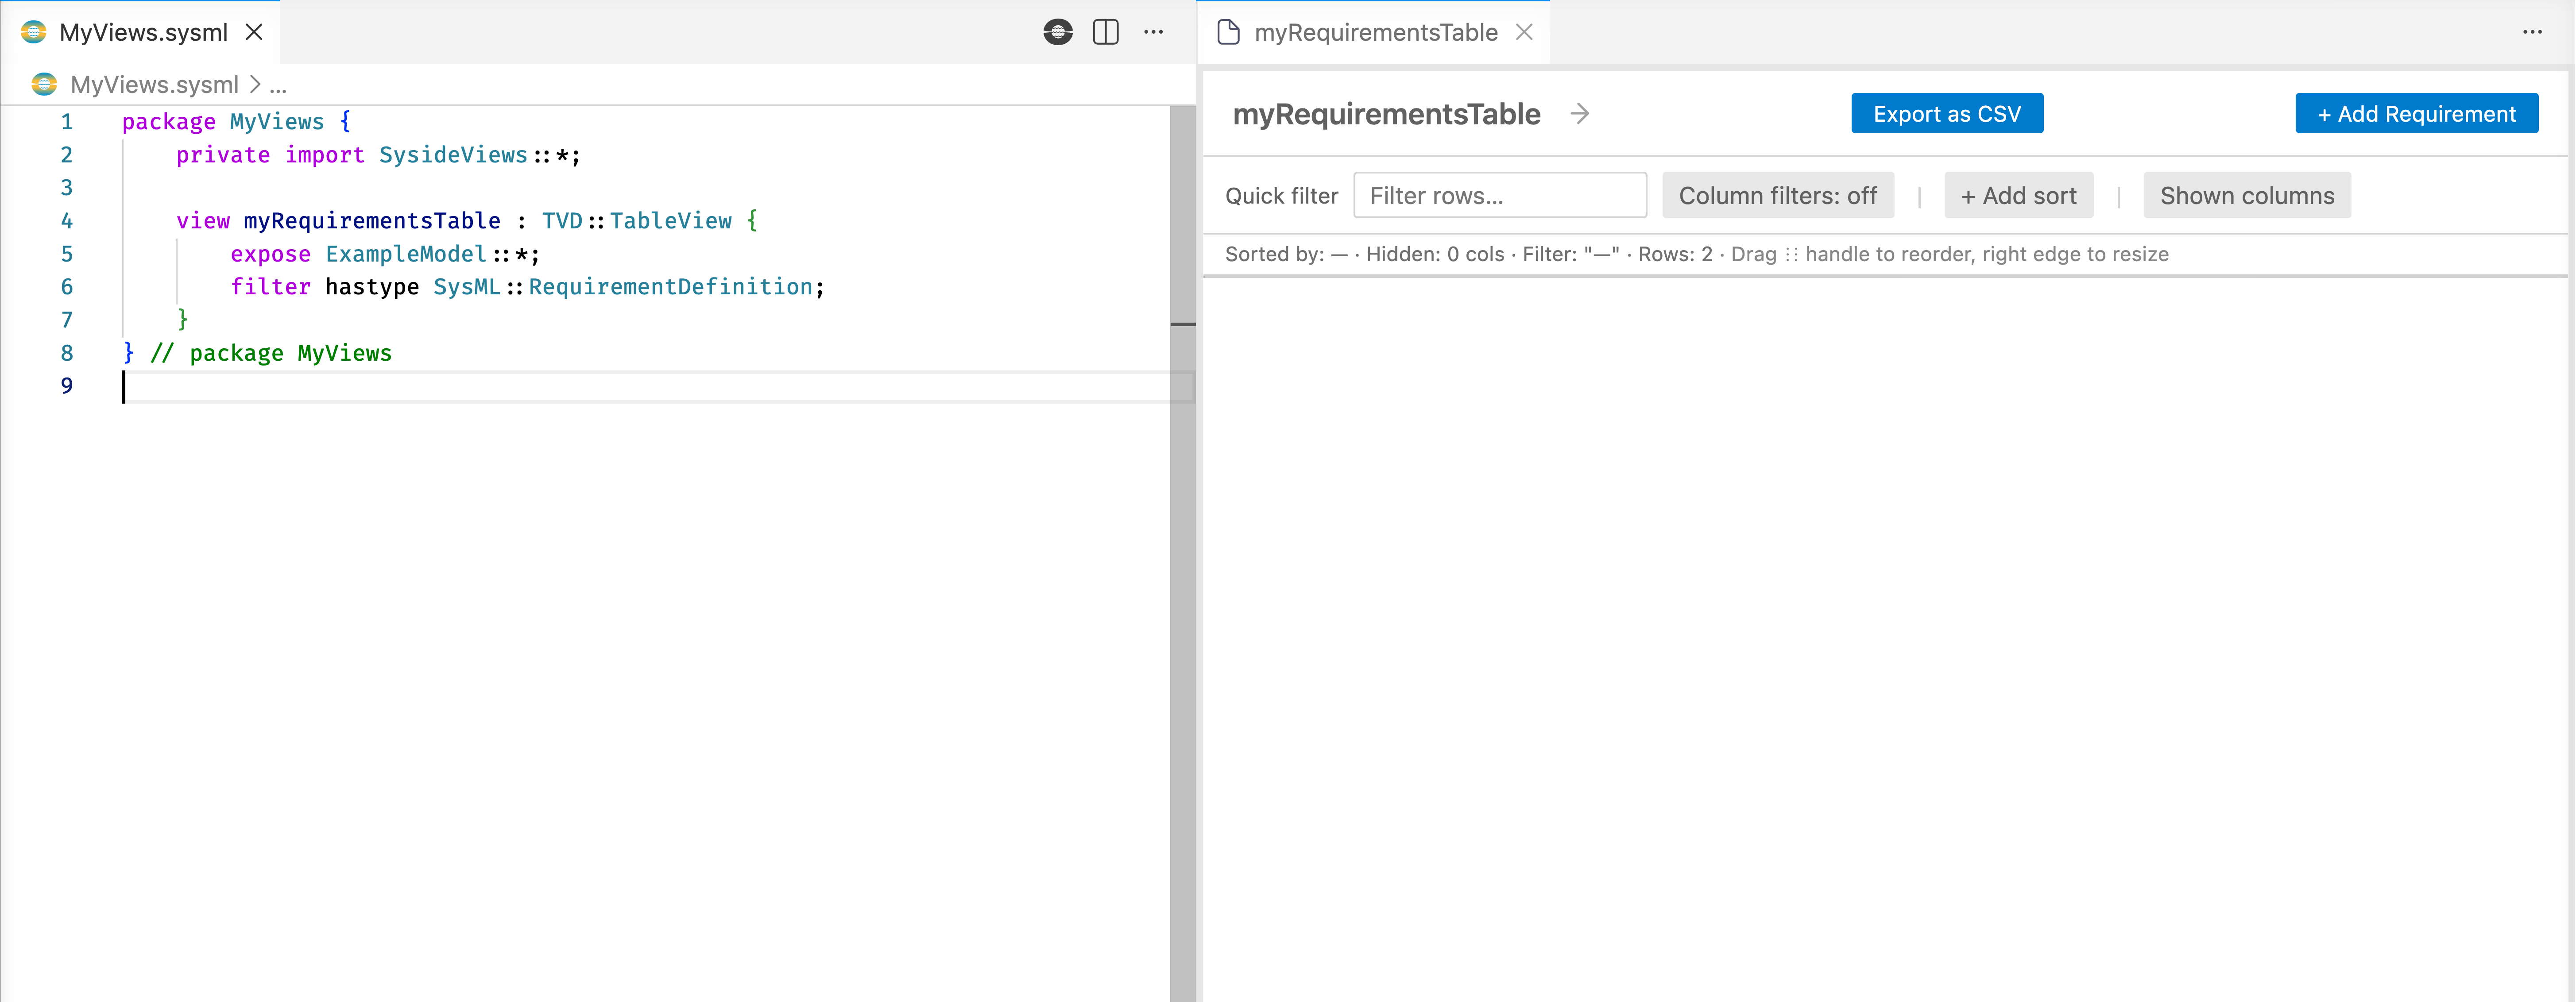
At this point in time, you should be able to open the myRequirementsTable view through
the SysMLv2 Views panel, but it should be empty as no columns are defined yet.
Add a column
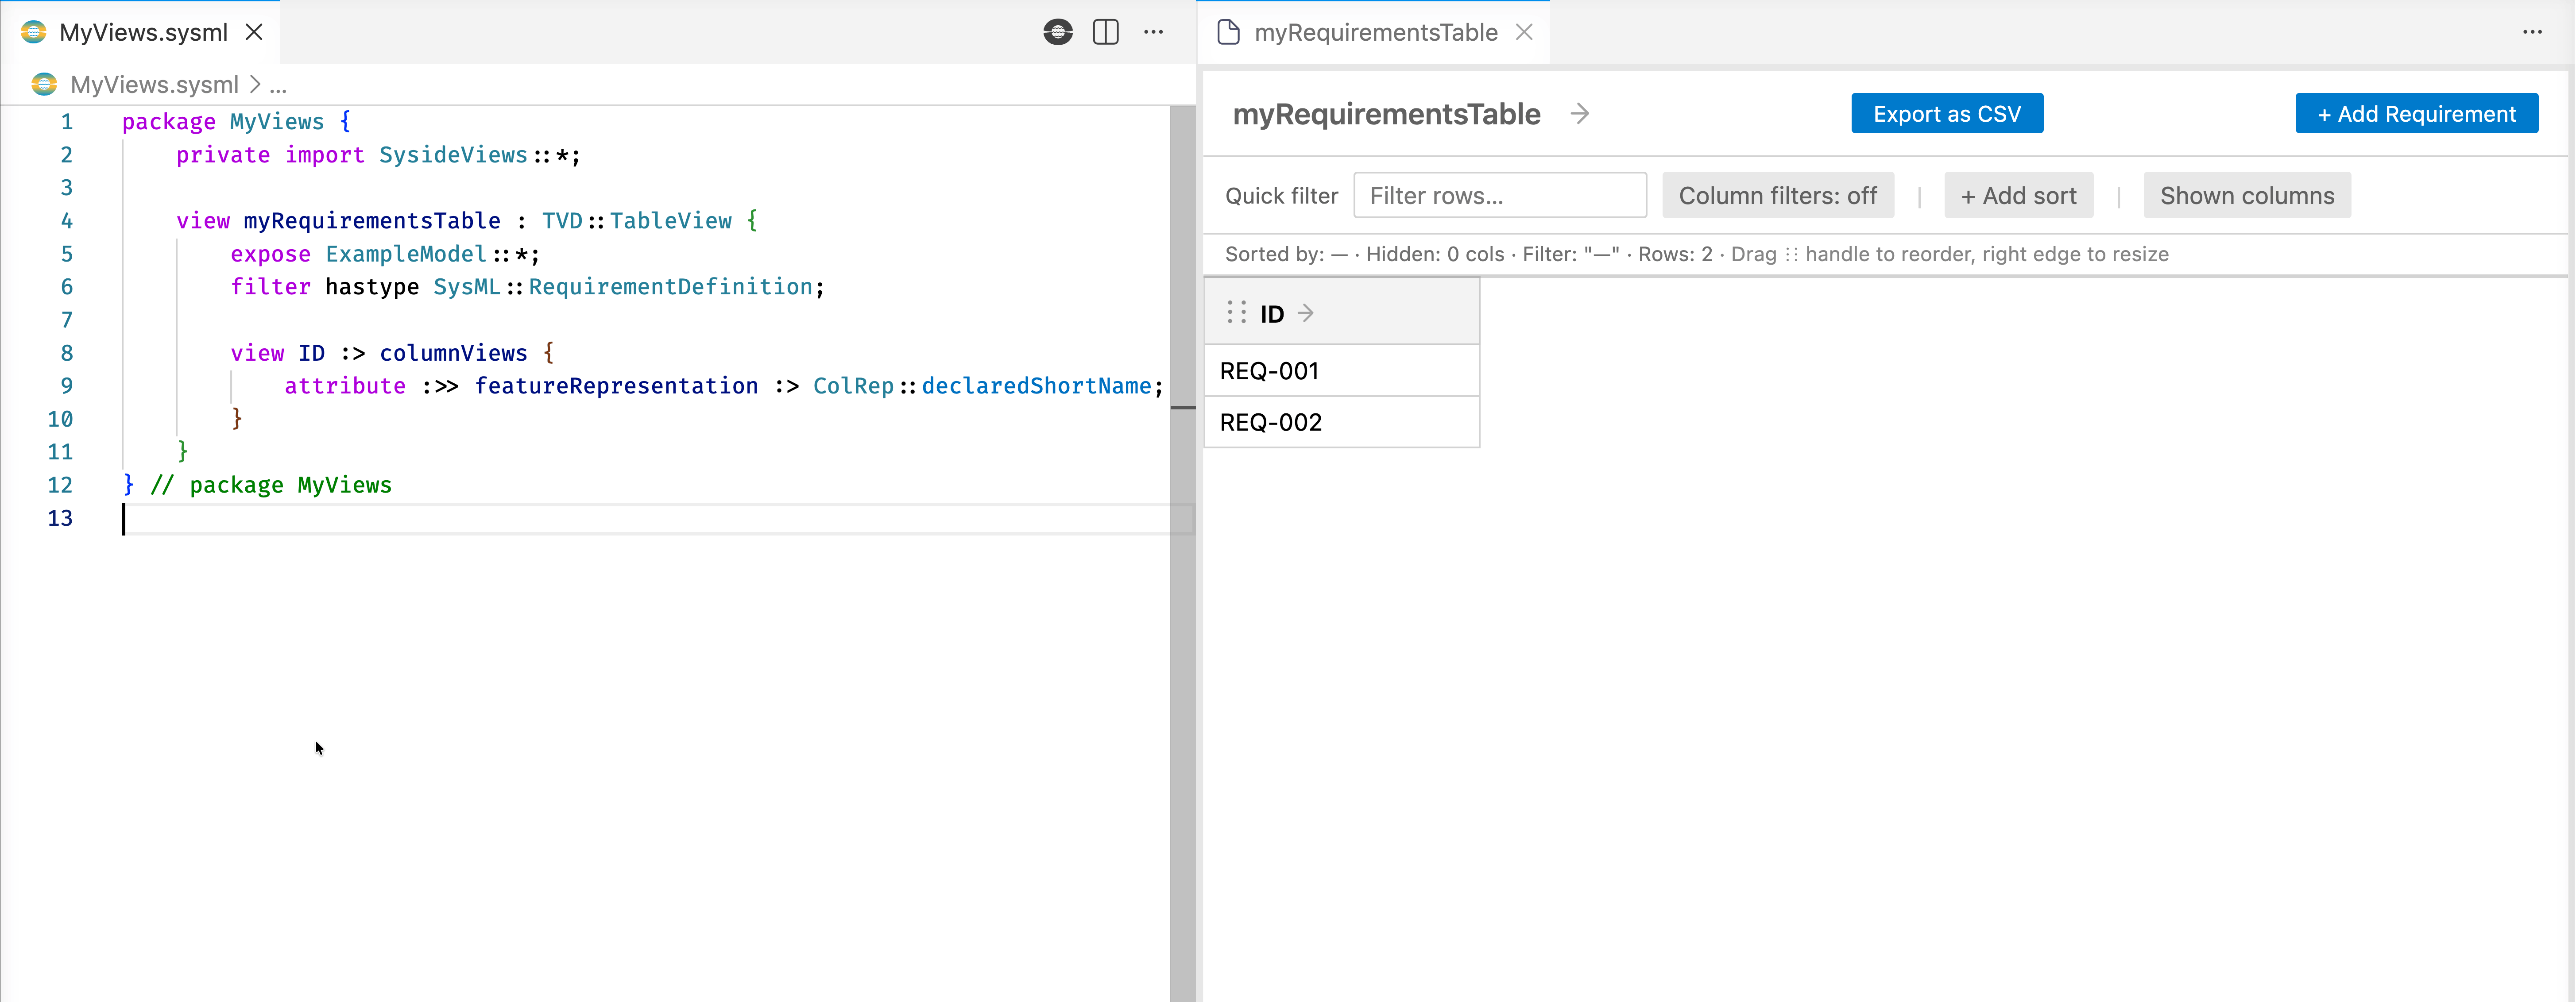
Each child view subsetting columnViews becomes one column, and its declared name
becomes the column header, exactly as written. Add this column inside the view to
show each requirement’s ID:
view ID :> columnViews {
    attribute :>> featureRepresentation :> ColRep::declaredShortName;
}
The featureRepresentation attribute selects what aspect of the row element the
cells render: here the declared short name, which is where a requirement ID lives.
The ID column now shows REQ-001 and REQ-002.
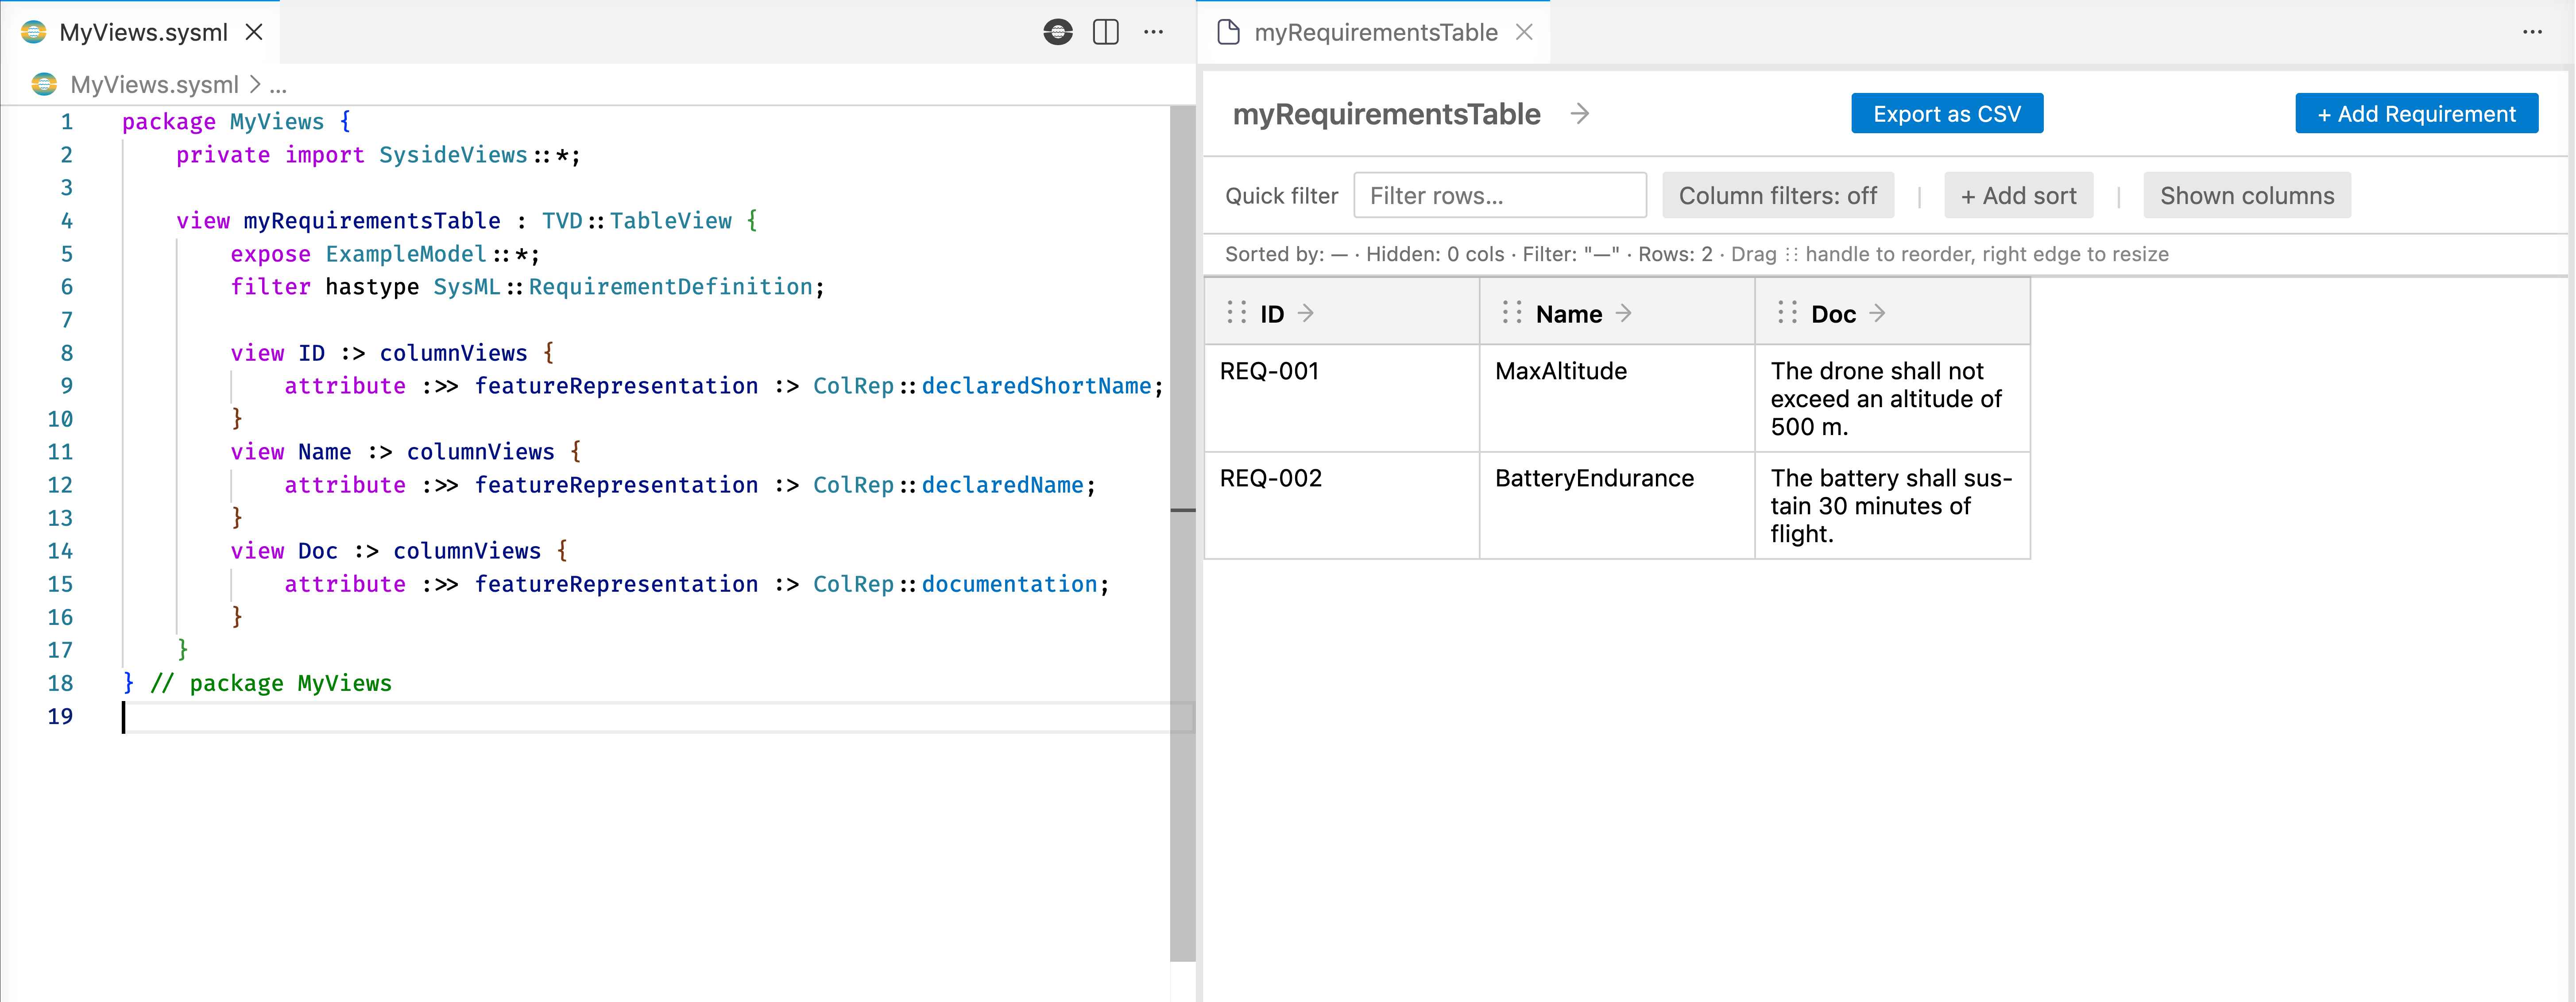
Further columns can render other aspects of the same row element by picking different representations, here the declared name and the documentation body:
view Name :> columnViews {
    attribute :>> featureRepresentation :> ColRep::declaredName;
}
view Doc :> columnViews {
    attribute :>> featureRepresentation :> ColRep::documentation;
}
The full catalog of representations spans names, documentation, attribute values, and more (see Representations). Some representations are writable, making their cells editable straight from the table (see Editable representations).
The table now has three columns: ID, Name, and Doc.
Reach related elements
A cell does not have to be about the row element itself. Every column so far
implicitly describes baseViewElement, the default feature a cell represents: on
each row it is that row’s own element, MaxAltitude on the first and
BatteryEndurance on the second. A navigation chain, written in columnFeature,
starts from baseViewElement and walks to a related element through steps
such as Subject or Owner (see Navigation chains):
view 'Subject Name' :> columnViews {
    :>> columnFeature = Subject(baseViewElement);
    attribute :>> featureRepresentation :> ColRep::name;
}
Warning
Unlike featureRepresentation, columnFeature is not an attribute. Writing
attribute :>> columnFeature = … changes the feature’s type and breaks the column.
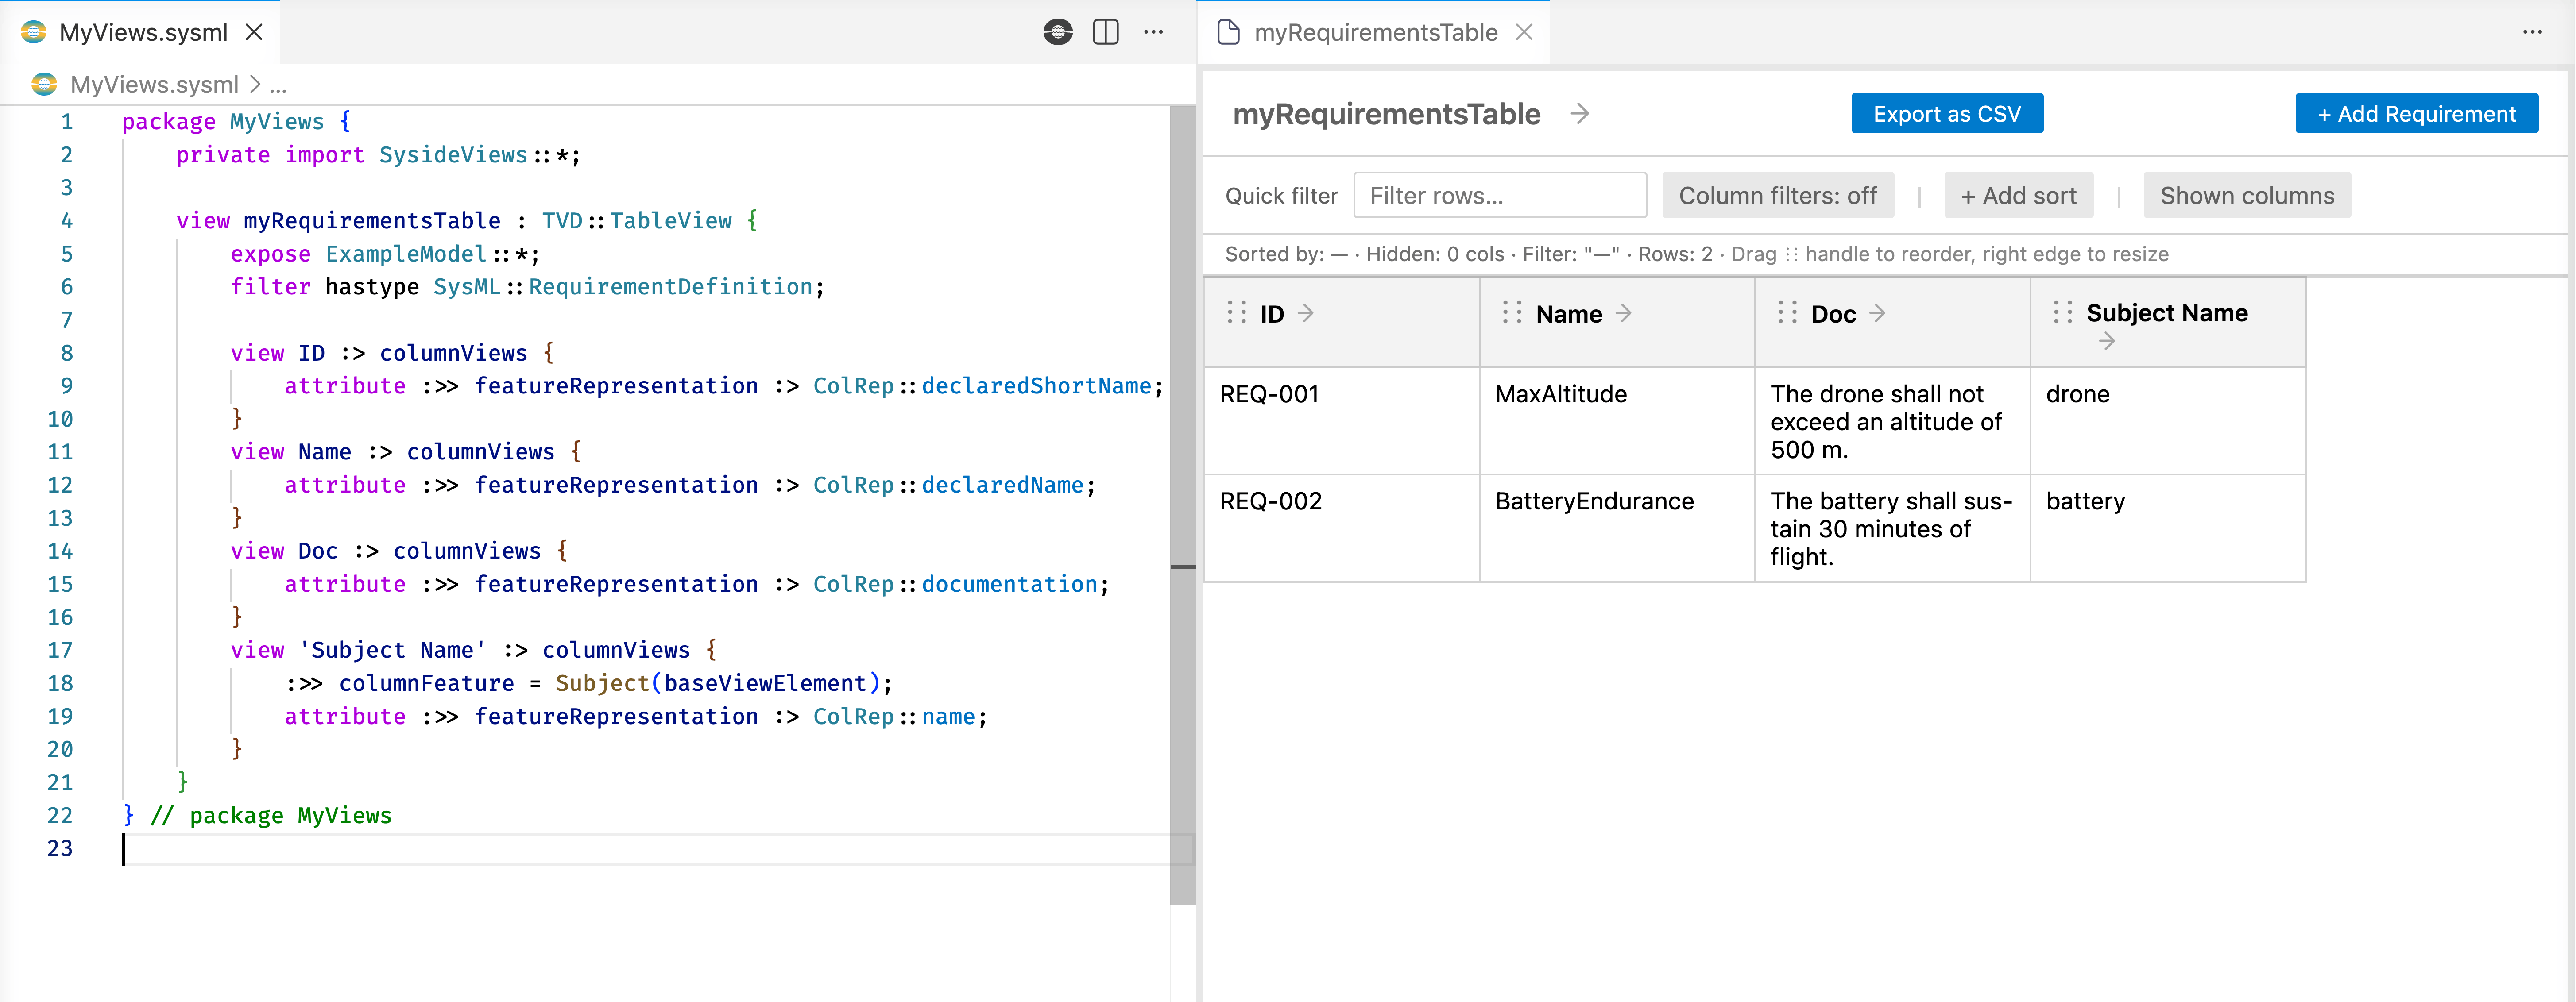
On the first row the chain runs from MaxAltitude to its subject drone, and the
representation then renders that subject’s name. The two halves are independent, so
any representation can follow any chain. A quoted view name such as
'Subject Name' allows spaces in the header.
The Subject Name column shows drone and battery.
Steps compose by nesting, so a chain can walk several hops. This column continues past the subject to the definition that types it, and renders that definition’s documentation:
view 'Subject Doc' :> columnViews {
    :>> columnFeature = DefinitionsFirst(Subject(baseViewElement));
    attribute :>> featureRepresentation :> ColRep::documentation;
}
A nested chain reads from the inside out: on the first row, Subject runs from
MaxAltitude to drone, and DefinitionsFirst continues from drone to the
Drone definition, whose documentation the cell shows.
The finished table
The finished table has two rows and five columns. Subject Doc shows the documentation
from the Drone and Battery definitions.
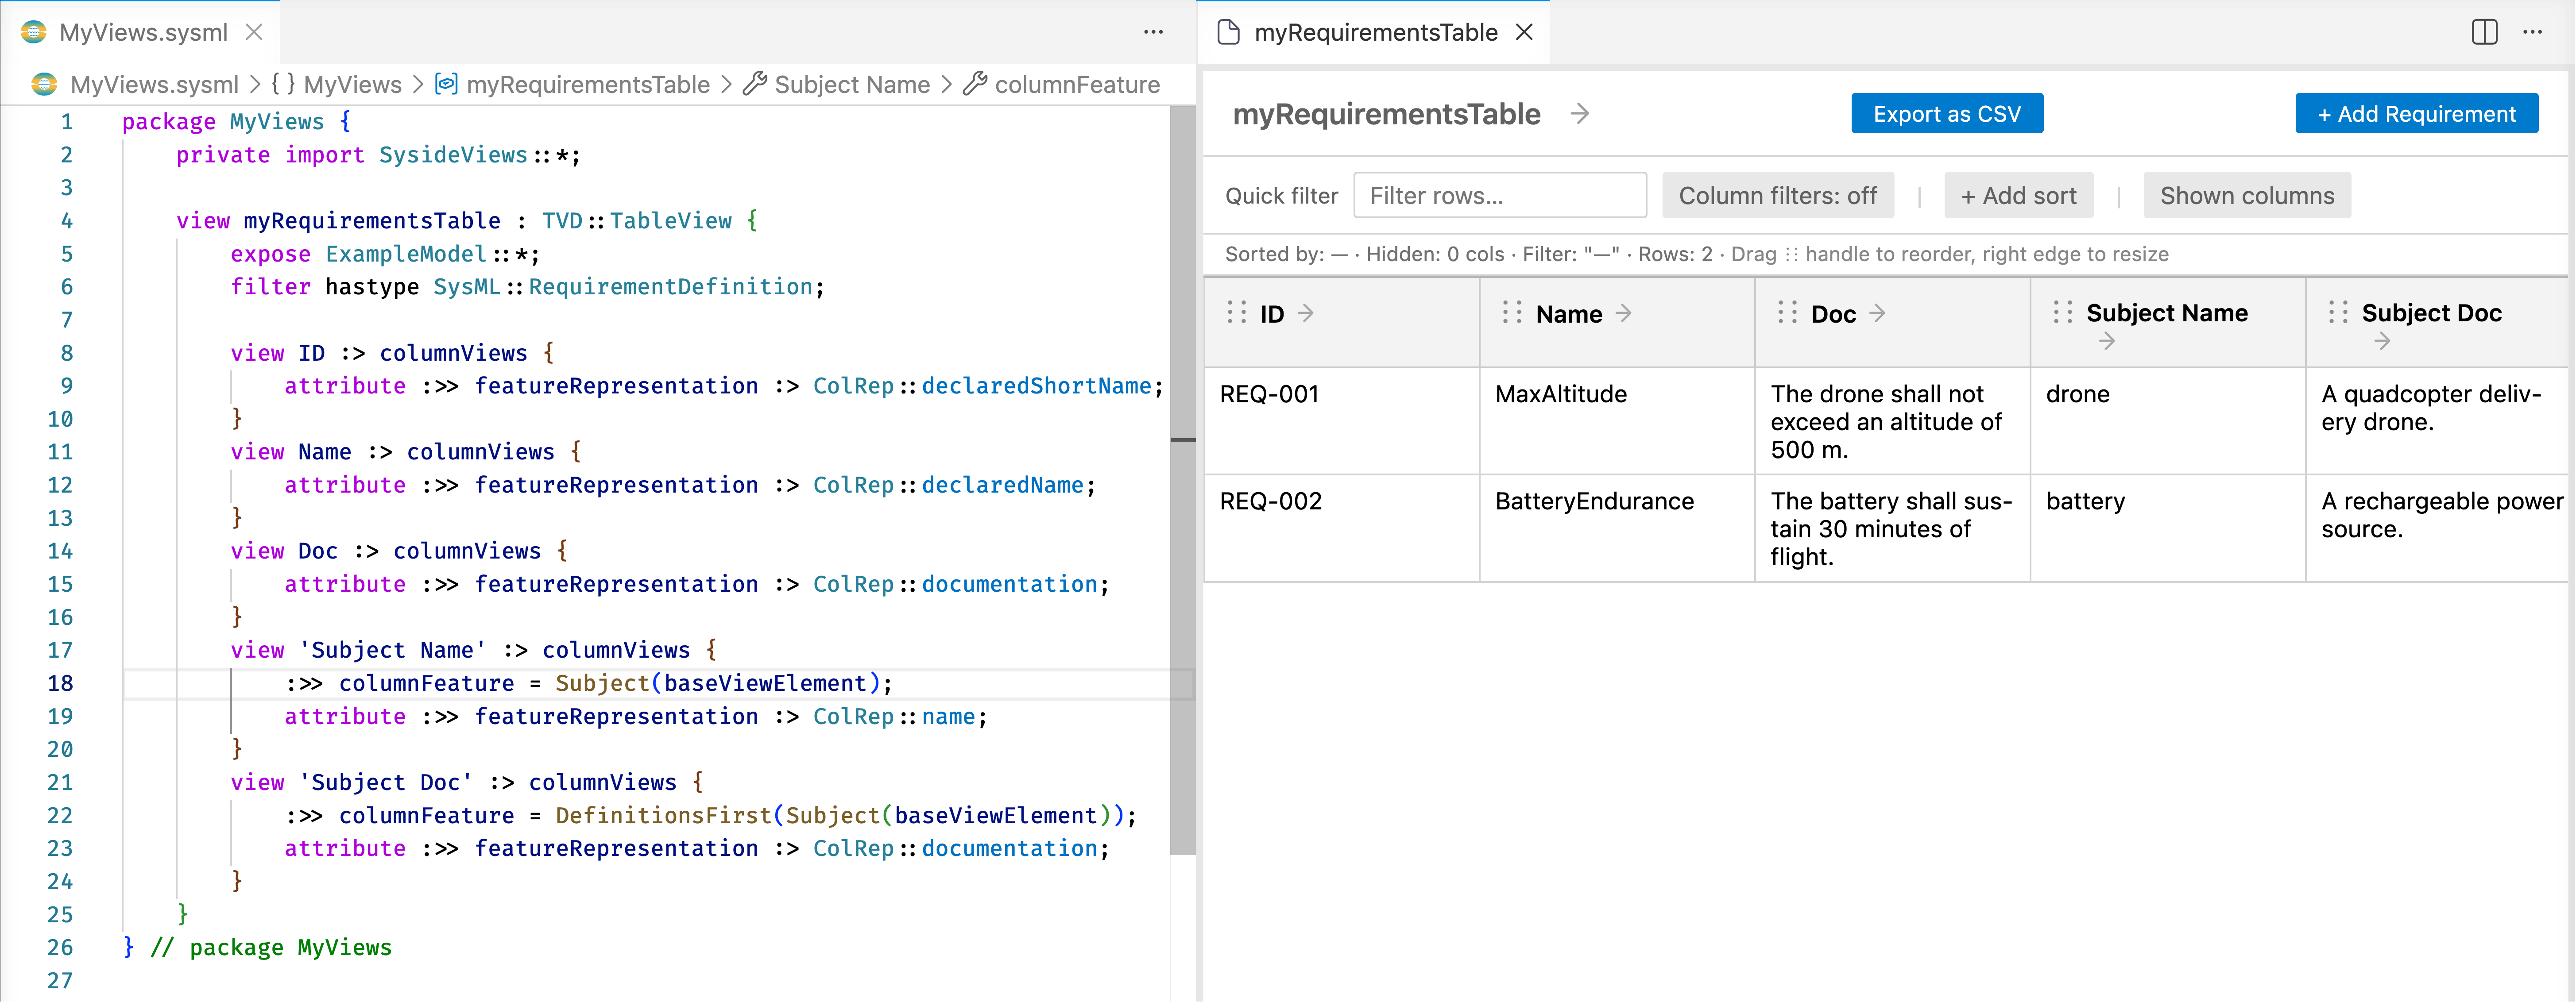
The complete MyViews.sysml file is:
package MyViews {
    private import SysideViews::*;

    view myRequirementsTable : TVD::TableView {
        expose ExampleModel::*;
        filter hastype SysML::RequirementDefinition;

        view ID :> columnViews {
            attribute :>> featureRepresentation :> ColRep::declaredShortName;
        }
        view Name :> columnViews {
            attribute :>> featureRepresentation :> ColRep::declaredName;
        }
        view Doc :> columnViews {
            attribute :>> featureRepresentation :> ColRep::documentation;
        }
        view 'Subject Name' :> columnViews {
            :>> columnFeature = Subject(baseViewElement);
            attribute :>> featureRepresentation :> ColRep::name;
        }
        view 'Subject Doc' :> columnViews {
            :>> columnFeature = DefinitionsFirst(Subject(baseViewElement));
            attribute :>> featureRepresentation :> ColRep::documentation;
        }
    }
}
What’s next
The pages that follow take each concept from this example in turn, in the order it appeared here:
Table view structure covers the rest of a table’s anatomy: the table and column attributes, and hierarchical tables that render rows as a collapsible tree.
Navigation chains explains how a column reaches a related element, including sharing one chain between columns and splitting a row into sub-rows.
Representations lists what a column can show about an element and which cells can be edited.
Common patterns has the columns most tables need, each ready to copy.